I have not been on the air much since my last post in February 2011. During that time I've been researching vertical antenna theory and practice and have decided to see how much better I might be able to do switching from my homebrew dipoles to a quarter-wave vertical. There is a lot of good material to read. I've spent time reading Jerry Sevick articles and his book on short vertical antennas. I've also been downloading articles from the QST archives, a fabulous source of theory and practice. Lastly, Rudy Severns, N6LF, has a great web site on antennas which has been a huge source of information.
I have laid in a 180 degree network of 20, 25-foot radials buried about an inch or so in the soil on the back side of my house. I've ordered an S9v31 vertical. Although I have learned from my reading and study that there is likely to be signal loss using a 180 degree radial pattern (vs. a 360 degree radial pattern) there is not much I can do about that since I have almost no yard and there are restrictions on what I can put up in terms of antennas. My plan is to only put the antenna up at night when it cannot be seen. As it is, the antenna will be mounted on the back side of the house and will likely be all but invisible from the front of the house since the roof peak should hide just about all its length.
There has been a delay in receiving the S9 antenna because S9 was recently sold to LDG Electronics. S9 is selling the antenna through Cheap Ham who appears to be having difficulty shipping S9 orders.
I'm very excited to see what kind of improvement I may get using the vertical over my current dipoles which are literally wrapped around my house about 20 feet up, a height which greatly reduces their effectiveness and radiation angle. I hope that with the S9 vertical, I will get good low angle radiation and a reduction in losses in radiation since the antenna is not touching the house as the dipoles are. Plus, the vertical will be facing northwest primarily, which, combined with its low angle radiation, should theoretically skip signals over northern latitudes in a way my dipoles cannot currently.
I hope to report back in the next week or so.
23 April 2011


27 February 2011
200 Meters & Down - the importance of spectrum defense
I just finished reading Clinton DeSoto's 200 Meters & Down. This is a fabulous early history of amateur radio from its very earliest days to the mid-1930s.

What struck me most about the book was the number of times amateur radio was saved from being elbowed off the bands often through the considerable efforts of the ARRL and its precursors. In some ways, the title says it all. By "limiting" operations of early amateur radio enthusiasts to 200 meters and down the US government hoped to so discourage them that they would simply give up and go away. At the time it was believed radio propagation in the range of 200 meters and down was about non-existent, so enamored was everyone of the much longer wavelengths. In the end, hams proved everyone wrong (of course).
Even so, amateurs rights to operate were and continue to be under siege. In the 1920s and 30s non-US governments feared the freedom amateur radio operators had to communicate at will worldwide. They sought to all but box radio amateurs out of the radio spectrum. We're not talking about communist regimes here. The governments of Great Britain, France and other european nations were the main instigators! Fortunately for amateur radio, influences from the US carried the day.
Wondering what all the fuss is about regarding spectrum defense? This book makes it clear that almost from day one, amateur radio has had to continually contend with both domestic and overseas governments to maintain access to the airwaves, despite the positive impact amateur radio operators have had since the earliest days whether in the military, emergencies, education or advancing the art and craft of radio.
If you really want to understand the early evolution of amateur radio, read 200 Meters & Down. It's a great read, full of fascinating insights and surprising stories.
Highly recommended.

What struck me most about the book was the number of times amateur radio was saved from being elbowed off the bands often through the considerable efforts of the ARRL and its precursors. In some ways, the title says it all. By "limiting" operations of early amateur radio enthusiasts to 200 meters and down the US government hoped to so discourage them that they would simply give up and go away. At the time it was believed radio propagation in the range of 200 meters and down was about non-existent, so enamored was everyone of the much longer wavelengths. In the end, hams proved everyone wrong (of course).
Even so, amateurs rights to operate were and continue to be under siege. In the 1920s and 30s non-US governments feared the freedom amateur radio operators had to communicate at will worldwide. They sought to all but box radio amateurs out of the radio spectrum. We're not talking about communist regimes here. The governments of Great Britain, France and other european nations were the main instigators! Fortunately for amateur radio, influences from the US carried the day.
Wondering what all the fuss is about regarding spectrum defense? This book makes it clear that almost from day one, amateur radio has had to continually contend with both domestic and overseas governments to maintain access to the airwaves, despite the positive impact amateur radio operators have had since the earliest days whether in the military, emergencies, education or advancing the art and craft of radio.
If you really want to understand the early evolution of amateur radio, read 200 Meters & Down. It's a great read, full of fascinating insights and surprising stories.
Highly recommended.
28 November 2010
2010 CQ WW CW contest update
More DX success this morning during the 2010 CQ WW contest. I worked ZL8X (New Zealand), my farthest DX to-date (over 7200 miles by Great Circle. Also worked several Hawaii contesters.
27 November 2010
My 2010 CQ WW CW contest station

for two reasons. First: it was the first real- world test of my just-
completed Elecraft T1 antenna tuner. It worked great! I can say that
because, second, I worked JA1DLE (Japan)! By Great Circle that's 4786
miles. Not bad for 3 watts into a humble dipole wrapped around my
house roofline.
I began the contest at 0000Z at my operating position in the garage.
It's been quite cold this past week, -10 on Wednesday, and in the 20s
on Saturday. After several hours it became a bit too cold to operate
in the garage, so I shifted upstairs into the house.
There, with assistance from my XYL, I quickly rigged up an indoor
dipole and set up my station in the spare bedroom.
Indoor antennas rarely outperform those outside and this was no
exception (either that or 40m condx had deteriorated in the late
evening to where I was hearing almost no signals).
I went QRT till Saturday AM when I returned to my original operating
position using my bent dipole at about 20 feet.
At 0200Z Saturday I fired up my trusty NorCal 40a and immediately
heard plenty of activity on 40m.
Plenty of action from the Pacific including China, Australia, New
Zealand, Hawaii and Japan.
I hailed each station calling but received no responses. Maybe I
hadn't done as good a job as I thought building the T1.
Then, at around 0330Z I heard JA1DLE calling CQ Test. I
responded...nothing. He responded to many callers. I called
again...nothing. I called again. JA1DLE sent .._ _..
I quickly sent my call. Nothing.
I called again. Again JA1DLE sent an uncertain .._ _..
I responded again with my call, but a bit slower.
JA1DLE responded: N7RCS 5NN 25
Contact! 5NN 3
Wow, the magic of Amateur radio. A faint, 3w signal shoots skyward
from my Idaho roof edge, along the way it gets stripped down to a
microwatt or two, then skips twice off the ionosphere and briefly
connects two radio stations 4786 miles apart.
All accomplished with gear made by my own hands: transceiver, antenna
tuner, antenna, feedline, and key.
Powerful.
24 November 2010
Elecraft T1: Construction update
Had contacted Elecraft tech support about a problem with a resistor reading. Couldn't get the component to read the expected resistance. Elecraft said some DMMs have problems reading component values in circuits with semiconductors. They advised to press on with construction. Their advice proved correct.
I completed assembly this evening!
- Ran final tests on the unit at my "bench". (Had to move upstairs from the garage as outside temperatures were hovering around 0F.) T1 checked out fine.
- Moved down to the garage. Connected T1 to a dummy load and ran additional tests. All checked out fine.
- Connected T1 to my dipole and NorCal 40A.
- Ran tests. All checked out fine.
- Antenna tuned and was putting out 2-3 watts, as expected.
Unfortunately, 40m band conditions were not good this evening. So, I'll be on early Thanksgiving morning to see if conditions have improved to make my QSO with the new tuner.
My plan is to participate in this weekend's CQ WW CW contest which starts Friday at 0000Z.
I completed assembly this evening!
- Ran final tests on the unit at my "bench". (Had to move upstairs from the garage as outside temperatures were hovering around 0F.) T1 checked out fine.
- Moved down to the garage. Connected T1 to a dummy load and ran additional tests. All checked out fine.
- Connected T1 to my dipole and NorCal 40A.
- Ran tests. All checked out fine.
- Antenna tuned and was putting out 2-3 watts, as expected.
Unfortunately, 40m band conditions were not good this evening. So, I'll be on early Thanksgiving morning to see if conditions have improved to make my QSO with the new tuner.
My plan is to participate in this weekend's CQ WW CW contest which starts Friday at 0000Z.
21 November 2010
Latest project: Elecraft T1 ATU
This small kit has proven to be a pretty good challenge. As always, it's all about technique.
I need an antenna tuner to make my 40m dipole useful. Since it's "mounted" as a loop wrapped around my house, and since I'm trying to maintain a low-profile with my amateur radio operating, I don't want to spend a lot of time climbing up and down ladders to make adjustments by physically trimming or bending the dipole to tune it.
The T1 is a great solution since its small, portable and automatic.
The kit only has a small number of parts, but they are tightly packed on two boards. Thankfully, Elecraft provides an excellent assembly manual with good photos of the PCBs. Still the control board is so tiny my Panavise can barely hold it.
The kit includes several toroids and although winding them is not too difficult, tinning and installing them was a challenge. My technique was to place the soldering iron, a 25w Weller, against the wire and apply solder. This technique seems to make the leads brittle. In some cases the leads would snap off as I bent them during installation.
Trying to fit them onto the board took some finesse as they are spaced pretty close together. One toroid had board space for a single toroid, but the assembly manual called for a double toroid (two glued together). I managed to fit in on, but just barely.
The first set of tests when fine, everything checked out fine. When I got to the second set of tests (near the end of assembly) I discovered what may be a bad capacitor (C19). So, at this point I'm at a standstill till Elecraft responds to my weekend email.
Elecraft tech support has been great. Very responsive.
I was hoping to complete the TR1 last Friday, but soon realized it would take longer. My goal was to finish in time to compete in a weekend contest. Ah well.
If all goes well, Elecraft will have a replacement part to me this week so I can get back on the air this coming weekend.
I need an antenna tuner to make my 40m dipole useful. Since it's "mounted" as a loop wrapped around my house, and since I'm trying to maintain a low-profile with my amateur radio operating, I don't want to spend a lot of time climbing up and down ladders to make adjustments by physically trimming or bending the dipole to tune it.
The T1 is a great solution since its small, portable and automatic.
The kit only has a small number of parts, but they are tightly packed on two boards. Thankfully, Elecraft provides an excellent assembly manual with good photos of the PCBs. Still the control board is so tiny my Panavise can barely hold it.
The kit includes several toroids and although winding them is not too difficult, tinning and installing them was a challenge. My technique was to place the soldering iron, a 25w Weller, against the wire and apply solder. This technique seems to make the leads brittle. In some cases the leads would snap off as I bent them during installation.
Trying to fit them onto the board took some finesse as they are spaced pretty close together. One toroid had board space for a single toroid, but the assembly manual called for a double toroid (two glued together). I managed to fit in on, but just barely.
The first set of tests when fine, everything checked out fine. When I got to the second set of tests (near the end of assembly) I discovered what may be a bad capacitor (C19). So, at this point I'm at a standstill till Elecraft responds to my weekend email.
Elecraft tech support has been great. Very responsive.
I was hoping to complete the TR1 last Friday, but soon realized it would take longer. My goal was to finish in time to compete in a weekend contest. Ah well.
If all goes well, Elecraft will have a replacement part to me this week so I can get back on the air this coming weekend.
08 November 2010
My first ARRL CW Sweepstakes
I had a blast! The last time I participated in a contest was the 1970's as a Novice! (Remember the old annual Novice Round-up contests?) This time around I was operating QRP on 40m and managed to notch 39 contacts. Not bad for my first effort and only operating for a few hours.
I really appreciate what a great little rig my NorCal 40A is. The keyer worked flawlessly and made it possible for me to keep up with the Big Dogs with speed if not with power. I worked 20 states, including Alaska, Florida and Maine.
My goal for the 2011 CW Sweepstakes is 100 contacts. I still plan to run QRP, but I'm hoping to be active on more than just 40 kHz of 40 meters.
I really appreciate what a great little rig my NorCal 40A is. The keyer worked flawlessly and made it possible for me to keep up with the Big Dogs with speed if not with power. I worked 20 states, including Alaska, Florida and Maine.
My goal for the 2011 CW Sweepstakes is 100 contacts. I still plan to run QRP, but I'm hoping to be active on more than just 40 kHz of 40 meters.
05 November 2010
A new project and a new distance record
I recently built an SWR meter but soon realized that without an antenna tuner to straighten out high SWR my signals were not going far. So, my next project is the Elecraft T1 QRP auto-tuner. I've been using a loaner MFJ 940 from N7CE which has made a huge difference in my signal.
Last evening I worked KH6MB in Hawaii on 7023 MHz at 0240Z, my longest distance QRP QSO to date: 2869 miles (Great Circle calculation). My previous best had been a QRP QSO with W5EIY in Enid, Oklahoma on 24 October 2010 on 7048 MHz at 0430Z.
I hope to receive the T1 in the next few days. It should only take a few days to build it. I downloaded the operator and assembly manuals last evening. So, I'll be ready to start on the kit arrives.
The other cool thing is that I'm beginning to receive QSL cards again! That got me thinking about my old QSL cards, so I got my old cards out from back in the 1970s which brought back a lot of fond memories of my Novice days as WN2MFW. Great times! Going through the cards made me decide to join the QCWA.
Last evening I worked KH6MB in Hawaii on 7023 MHz at 0240Z, my longest distance QRP QSO to date: 2869 miles (Great Circle calculation). My previous best had been a QRP QSO with W5EIY in Enid, Oklahoma on 24 October 2010 on 7048 MHz at 0430Z.
I hope to receive the T1 in the next few days. It should only take a few days to build it. I downloaded the operator and assembly manuals last evening. So, I'll be ready to start on the kit arrives.
The other cool thing is that I'm beginning to receive QSL cards again! That got me thinking about my old QSL cards, so I got my old cards out from back in the 1970s which brought back a lot of fond memories of my Novice days as WN2MFW. Great times! Going through the cards made me decide to join the QCWA.
20 October 2010
The impact of SWR on QRP
Although I've had my NorCal 40A on the air for several weeks now, I've only rarely made contacts and began to realize that I probably had to investigate the antenna side of the equation.
I spoke with Ron, N7CE, about it and he offered to let me use his tuner/SWR/watt meter. I had built a watt meter but had yet to use it. Ron stopped by at work and was good enough to loan me his MFJ-904 unit. Yesterday evening I hooked the 904 up to my NorCal 40A and immediately realized that the reason for my meager list of QSOs was extremely high SWR, on the order of 3+:1. I'm lucky I didn't damage the 40A considering how high the SWR has been.
With the antenna and transmitter now well tuned my SWR dropped to about 1.2:1 and I could see that my power out was now just above 3w. Nice. That's what it should be.
At about 0100Z I heard a CQ from NW6R (outside Sacramento, CA) and responded. Web and I had a 20-minute QSO! Great Circle distance from his QTH to mine is about 625 miles, that's about twice my previous record with the 40A during a brief QSO into Pocatello, ID a few weeks ago.
I like the display on the MFJ-904 because it's possible to know both power out and SWR. And the unit is well built. Other comparably built units feature only indicator lights so you know when you're tuned, but there is no indication of power out or true SWR.
I spoke with Ron, N7CE, about it and he offered to let me use his tuner/SWR/watt meter. I had built a watt meter but had yet to use it. Ron stopped by at work and was good enough to loan me his MFJ-904 unit. Yesterday evening I hooked the 904 up to my NorCal 40A and immediately realized that the reason for my meager list of QSOs was extremely high SWR, on the order of 3+:1. I'm lucky I didn't damage the 40A considering how high the SWR has been.
With the antenna and transmitter now well tuned my SWR dropped to about 1.2:1 and I could see that my power out was now just above 3w. Nice. That's what it should be.
At about 0100Z I heard a CQ from NW6R (outside Sacramento, CA) and responded. Web and I had a 20-minute QSO! Great Circle distance from his QTH to mine is about 625 miles, that's about twice my previous record with the 40A during a brief QSO into Pocatello, ID a few weeks ago.
I like the display on the MFJ-904 because it's possible to know both power out and SWR. And the unit is well built. Other comparably built units feature only indicator lights so you know when you're tuned, but there is no indication of power out or true SWR.
12 October 2010
First NAQCC Sprint
Now that I've got my NorCal 40A on the air, I decided to try my first contest: the NAQCC Sprint which ran 0030Z - 0230Z this evening. There was one change to the frequencies due to a PJ DXpedition expected to cause QRM near QRP freqs. Unfortunately the shift to 0710 and up, left me out in the cold since my 40A only covers 7023-7066. Undaunted, I left work early to get home in time to join the fun.
40M was in good shape until about 0100Z at which point QRN went through the roof. It appered to be some kind of environmental noise as it started with a distinct "click." Regardless, I pressed on. Mostly listening through the QRN and occasionally sending my CQ NA. 90 minutes later I called it quits - QRN was just too much.
Came out to talk with the XYL and told her I didn't make any contacts because QRN was too intense on 40M. Mentioned it was odd how QRN seemed to switch on very suddenly. She suggested that maybe it was the lights. (We had installed these IKEA track lights ourselves some weeks ago.) I decided to see if perhaps my QRN source might be the lights. Fired the 40A up again, heard the QRN as usual. Had the XYL shut off the track lights ... presto! QRN disappeared!!
So, even though I had no success on the NAQCC Sprint, I did learn that I need to make sure the track lights are off when I'm on the air. I guess it was all worth it.
40M was in good shape until about 0100Z at which point QRN went through the roof. It appered to be some kind of environmental noise as it started with a distinct "click." Regardless, I pressed on. Mostly listening through the QRN and occasionally sending my CQ NA. 90 minutes later I called it quits - QRN was just too much.
Came out to talk with the XYL and told her I didn't make any contacts because QRN was too intense on 40M. Mentioned it was odd how QRN seemed to switch on very suddenly. She suggested that maybe it was the lights. (We had installed these IKEA track lights ourselves some weeks ago.) I decided to see if perhaps my QRN source might be the lights. Fired the 40A up again, heard the QRN as usual. Had the XYL shut off the track lights ... presto! QRN disappeared!!
So, even though I had no success on the NAQCC Sprint, I did learn that I need to make sure the track lights are off when I'm on the air. I guess it was all worth it.
10 October 2010
40A is on the air!
Although I completed my NorCal 40A several weeks ago, I discovered that while the receive section worked great, I had no output on the transmit side. Took it to work for N7CE to look at on an o-scope and discovered that I appeared to have a cold solder joint on a JFET. Removed and reinstalled the JFET, but still no output.
Then, through pure serendipity I discovered the K9YA Telegraph newsletter. The sample issue I read from 2008 had a brief review from K9PL who had just built the 40A. Interestingly, upon completing his kit he had the same issue I did: great receive but out output. He rewound T1 and, voila! All was well. On the strength of that suggestion I uninstalled, rewound and reinstalled T1 in my 40A and...voila! I scored a QSO on my first call with W0WN in Pocatello, ID. A few minutes later I had a nice chat with KE7LKW in White Salmon, WA.
So, finally I'm off and running. I plan to participate in my first QRP contest on Tuesday: the NAQCC Sprint. Can't wait!
Then, through pure serendipity I discovered the K9YA Telegraph newsletter. The sample issue I read from 2008 had a brief review from K9PL who had just built the 40A. Interestingly, upon completing his kit he had the same issue I did: great receive but out output. He rewound T1 and, voila! All was well. On the strength of that suggestion I uninstalled, rewound and reinstalled T1 in my 40A and...voila! I scored a QSO on my first call with W0WN in Pocatello, ID. A few minutes later I had a nice chat with KE7LKW in White Salmon, WA.
So, finally I'm off and running. I plan to participate in my first QRP contest on Tuesday: the NAQCC Sprint. Can't wait!
23 September 2010
What makes Ham Radio such a great hobby
I recently finished building a QRP xcvr which worked great on the receive side but had no output. I did the best troubleshooting I could do with the simple tools and skills I had (I'm not an engineer), but still was unable to resolve the problem. I exchanged several emails with QRP Bob from Wilderness Radio. He was fabulous and got me thinking about how to identify the problem. My problem was that I lacked the proper tools and expertise.
After many days, I realized I had hit a wall.
It was time to put a call out to the hams at the Palouse Hills Amateur Radio Club, where I'm a member. In less than 24 hours I had several offers for help. In the end Ron, N7CE, hooked my rig hooked up to an oscilloscope to diagnose the problem. It appeared to be a faulty JFET just after the xmit mixer section. I removed the JFET to confirm it was defective, but it seemed fine when tested outside the circuit. Ron reinserted the JEFT onto the circuit board and tested again. The JFET and rig worked fine! Apparently it was a cold solder joint. Problem solved.
This was a great experience, but not just because the problem was resolved. In the bargain I learned a bit more about how to troubleshoot these kinds of problems, discovered I had done a pretty good job building the kit (just had one bad solder!), realized I need a better multimeter on my bench, built an RF probe and QRP watt meter as part of my efforts to troubleshoot the problem.
Now I can't wait to log my first contact on my new rig. Not to mention that I can't wait to take on my next project.
And those are just some of things that make Ham Radio such a great hobby.
After many days, I realized I had hit a wall.
It was time to put a call out to the hams at the Palouse Hills Amateur Radio Club, where I'm a member. In less than 24 hours I had several offers for help. In the end Ron, N7CE, hooked my rig hooked up to an oscilloscope to diagnose the problem. It appeared to be a faulty JFET just after the xmit mixer section. I removed the JFET to confirm it was defective, but it seemed fine when tested outside the circuit. Ron reinserted the JEFT onto the circuit board and tested again. The JFET and rig worked fine! Apparently it was a cold solder joint. Problem solved.
This was a great experience, but not just because the problem was resolved. In the bargain I learned a bit more about how to troubleshoot these kinds of problems, discovered I had done a pretty good job building the kit (just had one bad solder!), realized I need a better multimeter on my bench, built an RF probe and QRP watt meter as part of my efforts to troubleshoot the problem.
Now I can't wait to log my first contact on my new rig. Not to mention that I can't wait to take on my next project.
And those are just some of things that make Ham Radio such a great hobby.
23 August 2010
The "Manhattan" Project ...

Manhattan-style kit construction.
My next project is a QRP wattmeter - created by the North Georgia
Radio Club and hence the kit's name: NoGaWaTT. The final product will
be housed in an Altoids tin. The ultimate in low-cost and compactness.
Once I finish the project I can complete final tube-up for my NorCal
40A.
... now to inventory!
08 August 2010
NorCal 40A Completed

power supply cable that I made before I could power up and do VFO and
alignment work.
Completed alignment and tuning with just my ears (as QRP Bob advised).
Adjustments went smoothly.
For me, wiring the keyer to the rig was the most challenging part of
the kit. But I was successful wiring it up (with XYL help to hold some
components steady).
The KC1 keyer is really a great add-on that I highly recommend. With
it I was able to easily determine the lo and hi tuning ranges, once I
programmed in the VFO offset.
02 August 2010
Final Assembly Completed
Completed final assembly on July 31. The unit looks great! I really like the way the cover latches to the bottom of the case. Makes it a snap to get access to the PCB.
I still need to do testing and tuning. Since I only have an analog meter I'll mostly be tuning by ear.
Next, I need to assemble, install and set up the KC1 keyer unit. I thought I would test and tune the xcvr before installing the KC1 unit. Once the KC1 is up and running, I can check my frequency using its frequency counter capabilities.
No time to complete these work this week as we've got company, but I hope to begin work this weekend.
It will be great to get back on the air again.
I still need to do testing and tuning. Since I only have an analog meter I'll mostly be tuning by ear.
Next, I need to assemble, install and set up the KC1 keyer unit. I thought I would test and tune the xcvr before installing the KC1 unit. Once the KC1 is up and running, I can check my frequency using its frequency counter capabilities.
No time to complete these work this week as we've got company, but I hope to begin work this weekend.
It will be great to get back on the air again.
31 July 2010
Toroid winding completed

Large toroid on the bottom is for the VFO.
For me, having a good magnifier was key to good winding and properly
adjusting the spacing of windings, especially on the VFO toroid, which
has 60 turns of #28 enamel wire. I used a small plastic probe to make
spacing adjustments.
Next step: installation of toroids.
After that: installation of the unit's controls, connectors and panels.
Then: final assembly, tuning & testing.
18 July 2010
NorCal 40A kit progress
Fixed and adjustable capacitors installed.

Electrolytics, ICs and final amp installed.


17 July 2010
Next project: NorCal 40A QRP xcvr
I'm ready to start my next QRP kit, the NorCal 40A 40m transceiver from Wilderness Radio.
Received the kit a few days ago and did the parts inventory. One resistor was missing, Bob's sending that.

Here is a shot of the front and rear plates, the enclosure, PCB and bag o' parts.

Here are the parts ready for inventory.
Read the instruction manual, which is well-laid out and am really looking forward to getting started. I bought the KC1 keyer option as well.
27 June 2010
Field Day 2010 - Day 2 - Moscow, ID
My day started at 0400 PST on Sunday. I promised to work 0400 through station close and site break-down and clean-up with the Palouse Hills Amateur Radio Club.
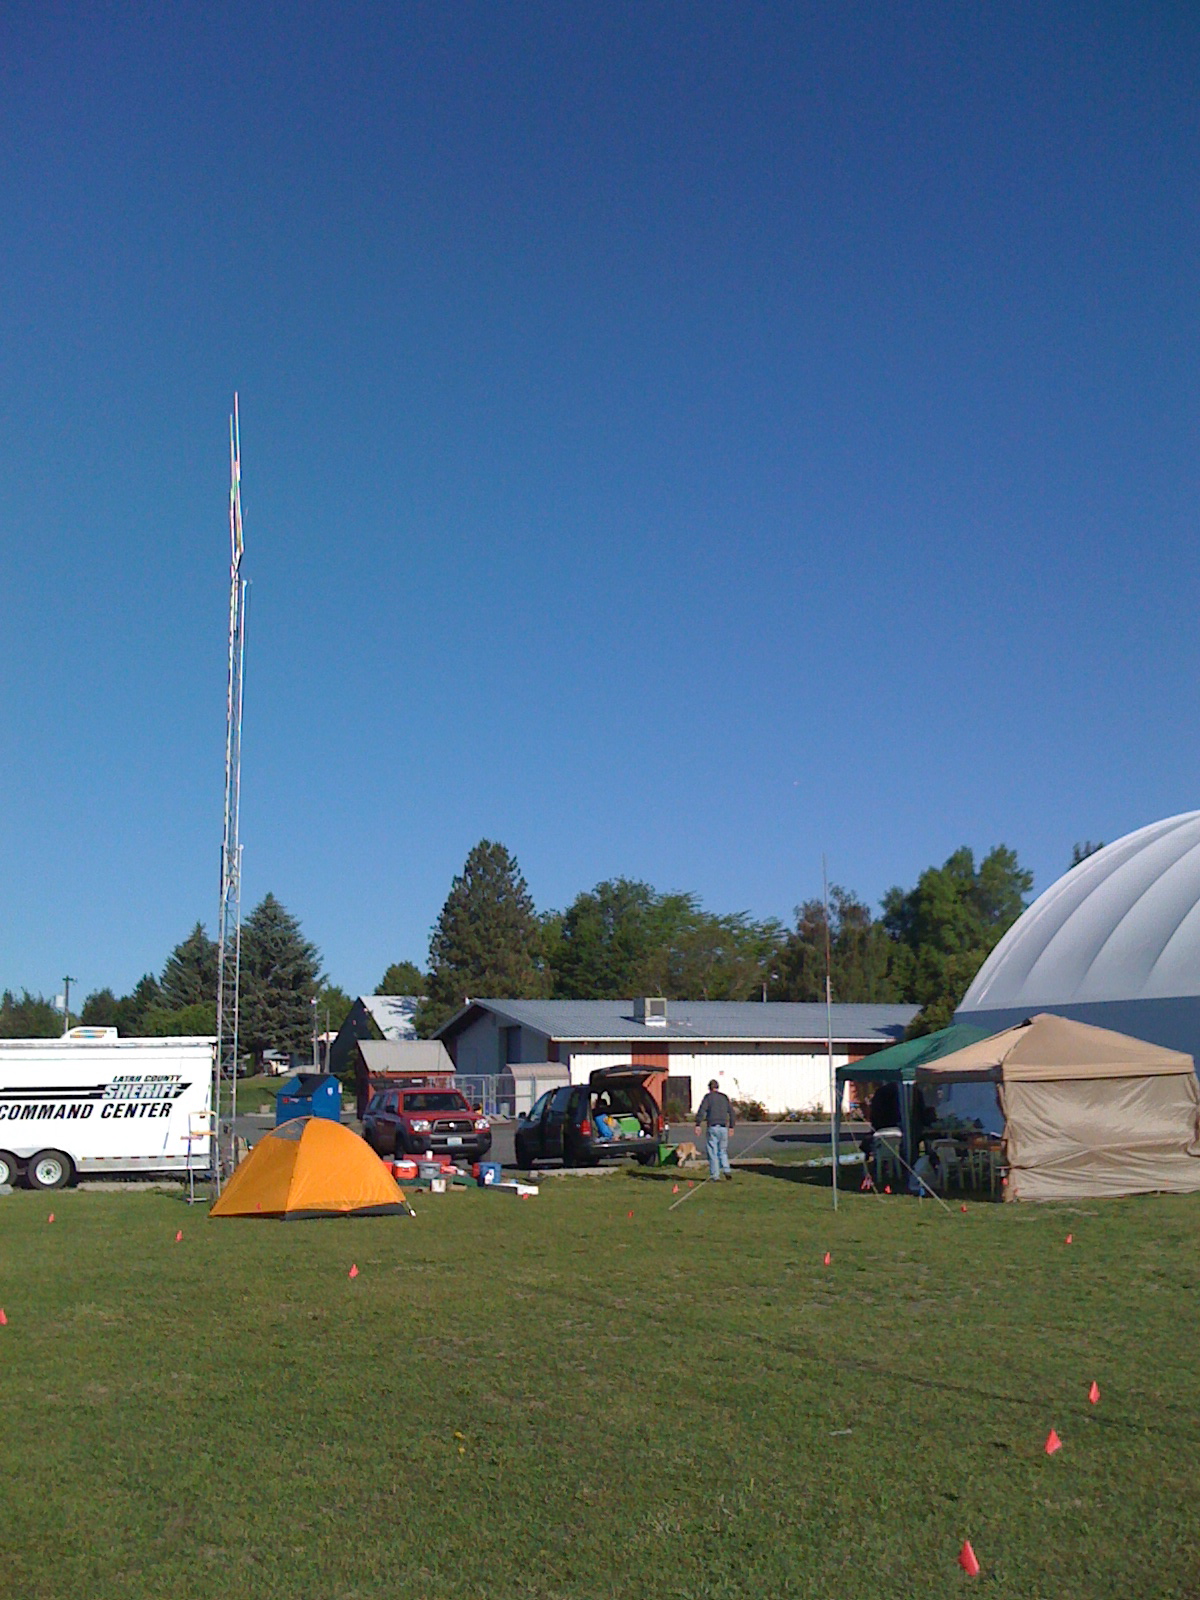
We were very fortunate to get the use of the county sheriff's emergency services trailer, which had some amateur radio gear already installed in it.
As it turns out, this particular emergency trailer (see photo below) had never been used until this Field day!

In a way it was fortunate as we uncovered several wiring and grounding issues that we addressed.
This worked out to be a great operating station and was able to accommodate several two-man operating positions throughout Field Day.
In addition, the trailer came with a nice crank-up tower which we put to good use to support some of our antennas. Nice.
One thing is for sure, we are now ready for true emergency operations since we now have first-hand experience with this unit. Next time (or I guess I should say the FIRST time) there is an emergency we'll be prepared should our assistance be needed to support emergency operations.
This next photo is a look at the tents that were set up for those
hardy souls who stayed overnight at our site. As it turned out, 80 meters really heated up and, at one point the guys cranked out over 100 QSOs in a hour! FB!
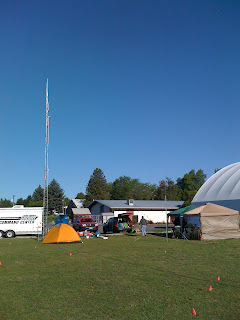
The only downside was sleeping on the ground, ah well, all for a good cause, right?
Next day W7NGI made cooked up some amazing pancakes and bacon to get things off to a solid start. Thanks, Ken! And he did it all on a classic Coleman propane camp cookstove.
Someone also brought in some ripe cherries (no doubt from Washington) which made a nice finish to breakfast.
...still not sure what that huge jar of pickles was all about, however...
Here's a shot of the combination breakfast and break tent set-up that was set up.

That's KI6DER, PHARC President, taking a break between sessions. BTW, if you ever need coax, he's your man.
Next, we've got a look inside the "shack:
That's KK7VO notching another contact in the early morning hours. I believe her dog Daisy (just out of view in this shot) was logging for her. : - )

In the next shot, we've got Joe and Ken burning up the band on 40 meter phone. Ken's got logging duty while Joe's in the hot seat.
We worked many states from Alaska and Hawaii to Texas, Ohio, Vermont and Massachusetts and more.
We were able to work phone, PSK-31 and, after a fashion and thanks to KE6DWM, we were able to notch a few CW contacts as well, though not how I had anticipated. He was able to get us set up to run CW through his PSK interface to a Yaesu rig. Worked great. Couldn't use my key since the Yaesu has a mini jack and I had a 1/4 inch jack on my key.
The next photo shows one of the other operating positions we had set up

We also had a GOTA position set up, which was great since we had folks from as far away as Alaska (well kind of) stop by to visit.
In addition KE6DWM's XYL took and passed her Technician license during Field Day. Congratulations!!
Do we get extra points for that? : -)
On top of that, she stuck around and made a bunch of contacts at the GOTA position.
Can her General class be far behind?
In this next photo we've got a shot of one of the "towers" we erected for our antennas. KK7VO had a 80-10m antenna attached with a nice loading coil near the center.
 Although this shot only appears to show a single guy wire, there were two others that kept this pole in place.
It did a good job for us supporting, I believe, 3-4 antennas.
We wrapped things up at noon PST having racked up more overall points than our 2009 Field Day performance, not to mention all visitors we had.
All in all it was, for me, a great Field Day experience.
I'm really hoping that for Field Day 2011, I'm ready with a full, self-contained QRP CW operating position, complete with antenna.
I was the only one in PHARC able to copy code at this year's field day, so my QSOs got us a few extra points.

That's all for now.
I'll say 73 and look to see you all at Field Day 2011!
N7RCS
We were very fortunate to get the use of the county sheriff's emergency services trailer, which had some amateur radio gear already installed in it.
As it turns out, this particular emergency trailer (see photo below) had never been used until this Field day!

In a way it was fortunate as we uncovered several wiring and grounding issues that we addressed.
This worked out to be a great operating station and was able to accommodate several two-man operating positions throughout Field Day.
In addition, the trailer came with a nice crank-up tower which we put to good use to support some of our antennas. Nice.
One thing is for sure, we are now ready for true emergency operations since we now have first-hand experience with this unit. Next time (or I guess I should say the FIRST time) there is an emergency we'll be prepared should our assistance be needed to support emergency operations.
This next photo is a look at the tents that were set up for those
hardy souls who stayed overnight at our site. As it turned out, 80 meters really heated up and, at one point the guys cranked out over 100 QSOs in a hour! FB!
The only downside was sleeping on the ground, ah well, all for a good cause, right?
Next day W7NGI made cooked up some amazing pancakes and bacon to get things off to a solid start. Thanks, Ken! And he did it all on a classic Coleman propane camp cookstove.
Someone also brought in some ripe cherries (no doubt from Washington) which made a nice finish to breakfast.
...still not sure what that huge jar of pickles was all about, however...
Here's a shot of the combination breakfast and break tent set-up that was set up.

That's KI6DER, PHARC President, taking a break between sessions. BTW, if you ever need coax, he's your man.
Next, we've got a look inside the "shack:
That's KK7VO notching another contact in the early morning hours. I believe her dog Daisy (just out of view in this shot) was logging for her. : - )

In the next shot, we've got Joe and Ken burning up the band on 40 meter phone. Ken's got logging duty while Joe's in the hot seat.
We worked many states from Alaska and Hawaii to Texas, Ohio, Vermont and Massachusetts and more.
We were able to work phone, PSK-31 and, after a fashion and thanks to KE6DWM, we were able to notch a few CW contacts as well, though not how I had anticipated. He was able to get us set up to run CW through his PSK interface to a Yaesu rig. Worked great. Couldn't use my key since the Yaesu has a mini jack and I had a 1/4 inch jack on my key.
The next photo shows one of the other operating positions we had set up

We also had a GOTA position set up, which was great since we had folks from as far away as Alaska (well kind of) stop by to visit.
In addition KE6DWM's XYL took and passed her Technician license during Field Day. Congratulations!!
Do we get extra points for that? : -)
On top of that, she stuck around and made a bunch of contacts at the GOTA position.
Can her General class be far behind?
In this next photo we've got a shot of one of the "towers" we erected for our antennas. KK7VO had a 80-10m antenna attached with a nice loading coil near the center.

It did a good job for us supporting, I believe, 3-4 antennas.
We wrapped things up at noon PST having racked up more overall points than our 2009 Field Day performance, not to mention all visitors we had.
All in all it was, for me, a great Field Day experience.
I'm really hoping that for Field Day 2011, I'm ready with a full, self-contained QRP CW operating position, complete with antenna.
I was the only one in PHARC able to copy code at this year's field day, so my QSOs got us a few extra points.

That's all for now.
I'll say 73 and look to see you all at Field Day 2011!
N7RCS
Subscribe to:
Posts (Atom)


 Posts
Posts


